2020年12月10日 星期四

How To Enable C# 7.1 Version with Visual Studio (轉貼)

 Approach 1 - Using Project Properties 

In this approach, go to your existing project where you want to point  to C# 7.1 and open project properties by right clicking on the project. Select properties in Visual Studio Solution Explorer window as below. 

How To Enable C# 7.1 Version To My Projects

Once the properties window opens, go to Build menu and click on Advanced button. Once this button is clicked a popup window will appear where you can see a language version drop down where we need to select C# 7.1 as shown below. 

As noticed in this dropdown, we find an option

C# latest major version (default)

When we select this option the runtime will take the latest major release available, in our case C# 7.0, and in the future, if there is a C# 8.0 release, this project will automatically point to the C# 8.0 compiler without any changes.

C# latest minor version (latest)

This is something different from the above, when we select this option the runtime will take the latest minor release, in our case C# 7.1  and in the future, if there is a C# 7.2 release, this project will automatically point to the C# 7.2 compiler without any changes.

If we select any other option, even if there are any major or minor changes, runtime won't consider those and will take only the compiler version which you provide here.

Once you select C# 7.1 from this drop-down, click on OK and save the project. Now your project will run on C# 7.1 compiler and you can use these new features.
2020年12月9日 星期三

Adding Class Details Window(Class Diagram Viewer) (轉貼)


C# Visual Studio 2017 快速產生類別圖

  • 2668
  •  0
  • C#
  •  2020-07-27

相信各位開發者剛接手到一個新專案時,有時候因為檔案太多而無法快速了解類別之間的關係。

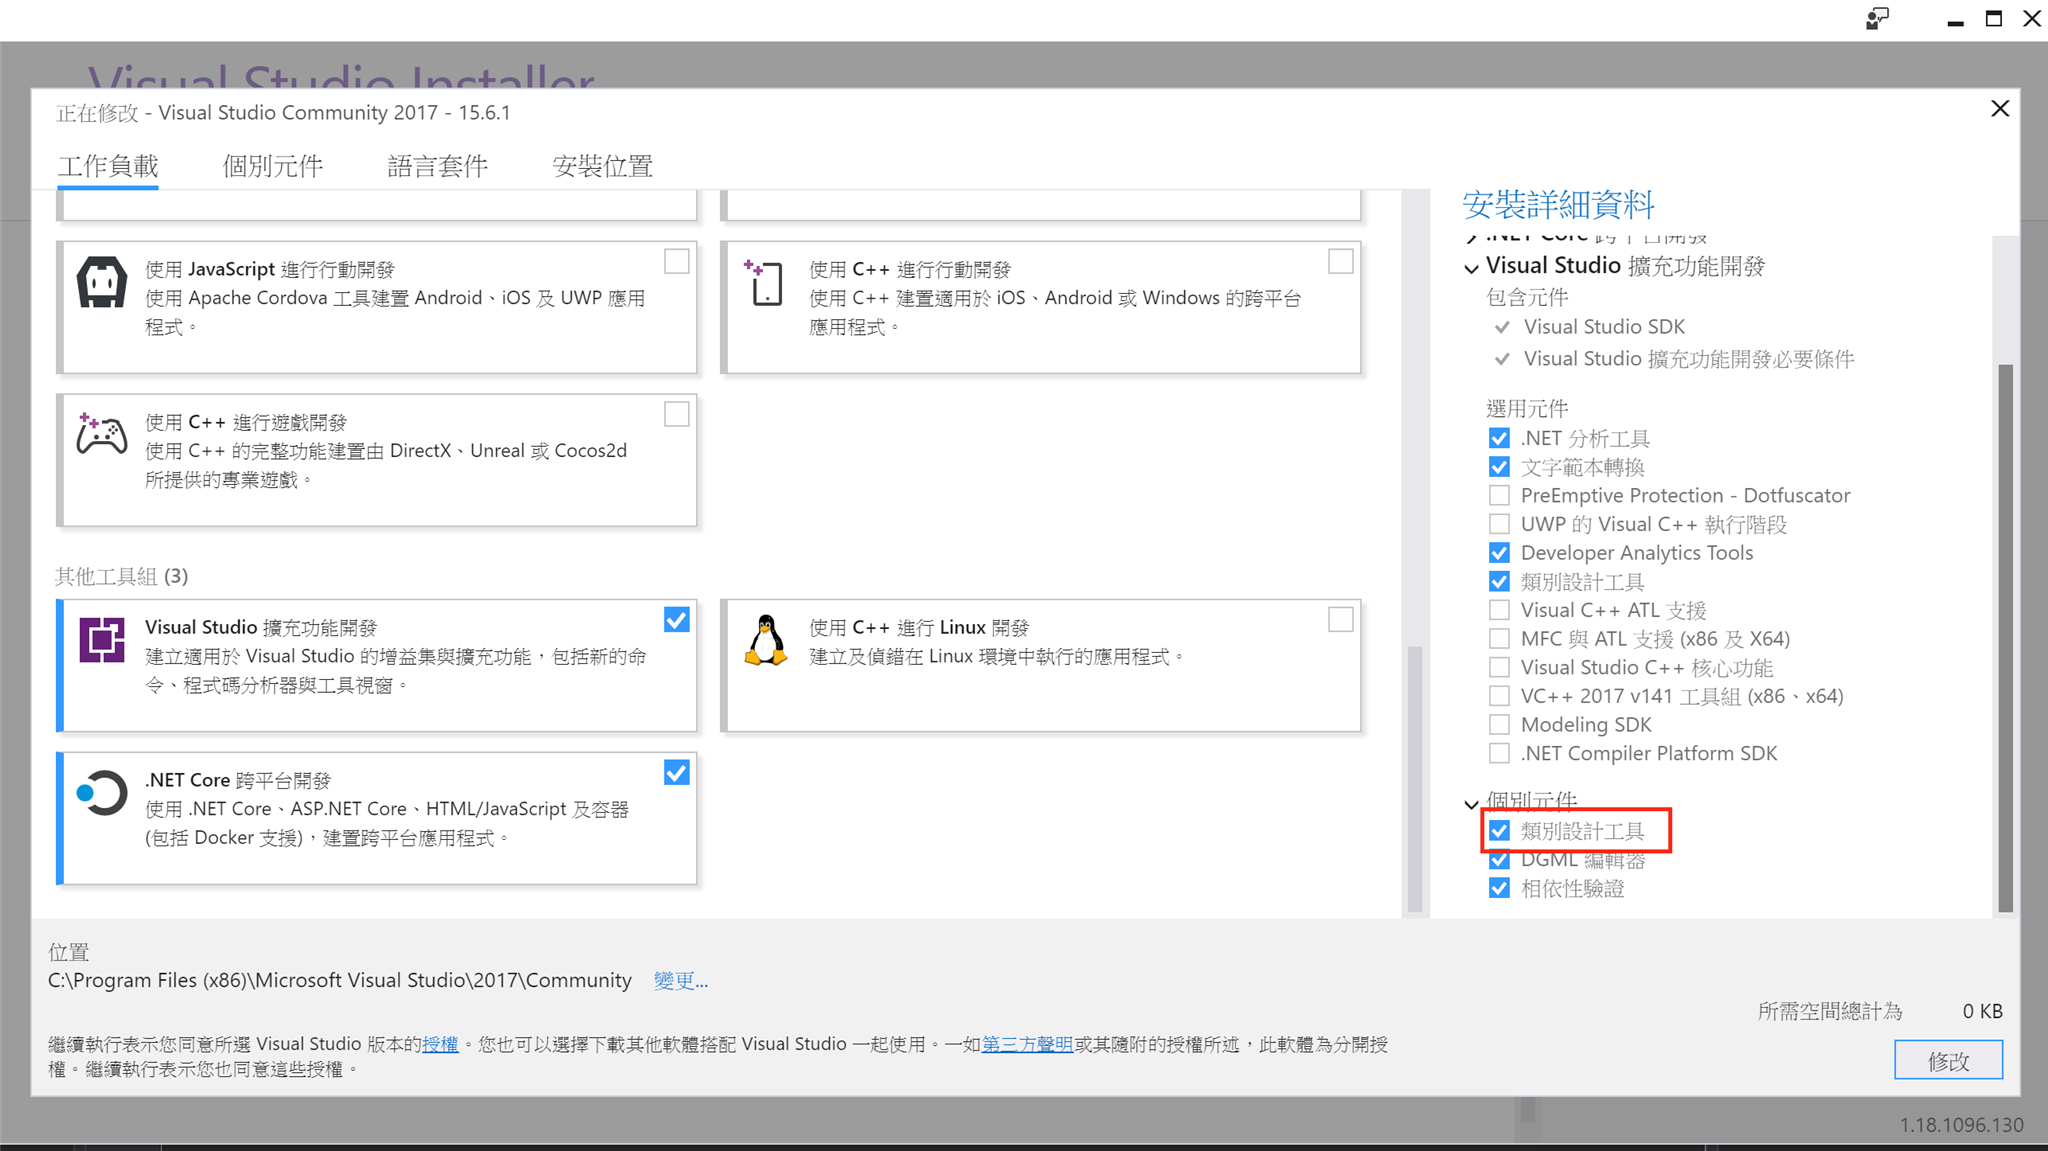
而在Visual Studio 2017當中,微軟官方貼心的新增一個功能-類別設計工具

若要開啟「類別設計工具」這個功能,我們需要額外安裝。

在工具->取得工具與功能,我們把 Visual Studio 2017 Installer 叫出來。

接著我們可以在下圖中的「個別元件」,將類別設計工具進行勾選。

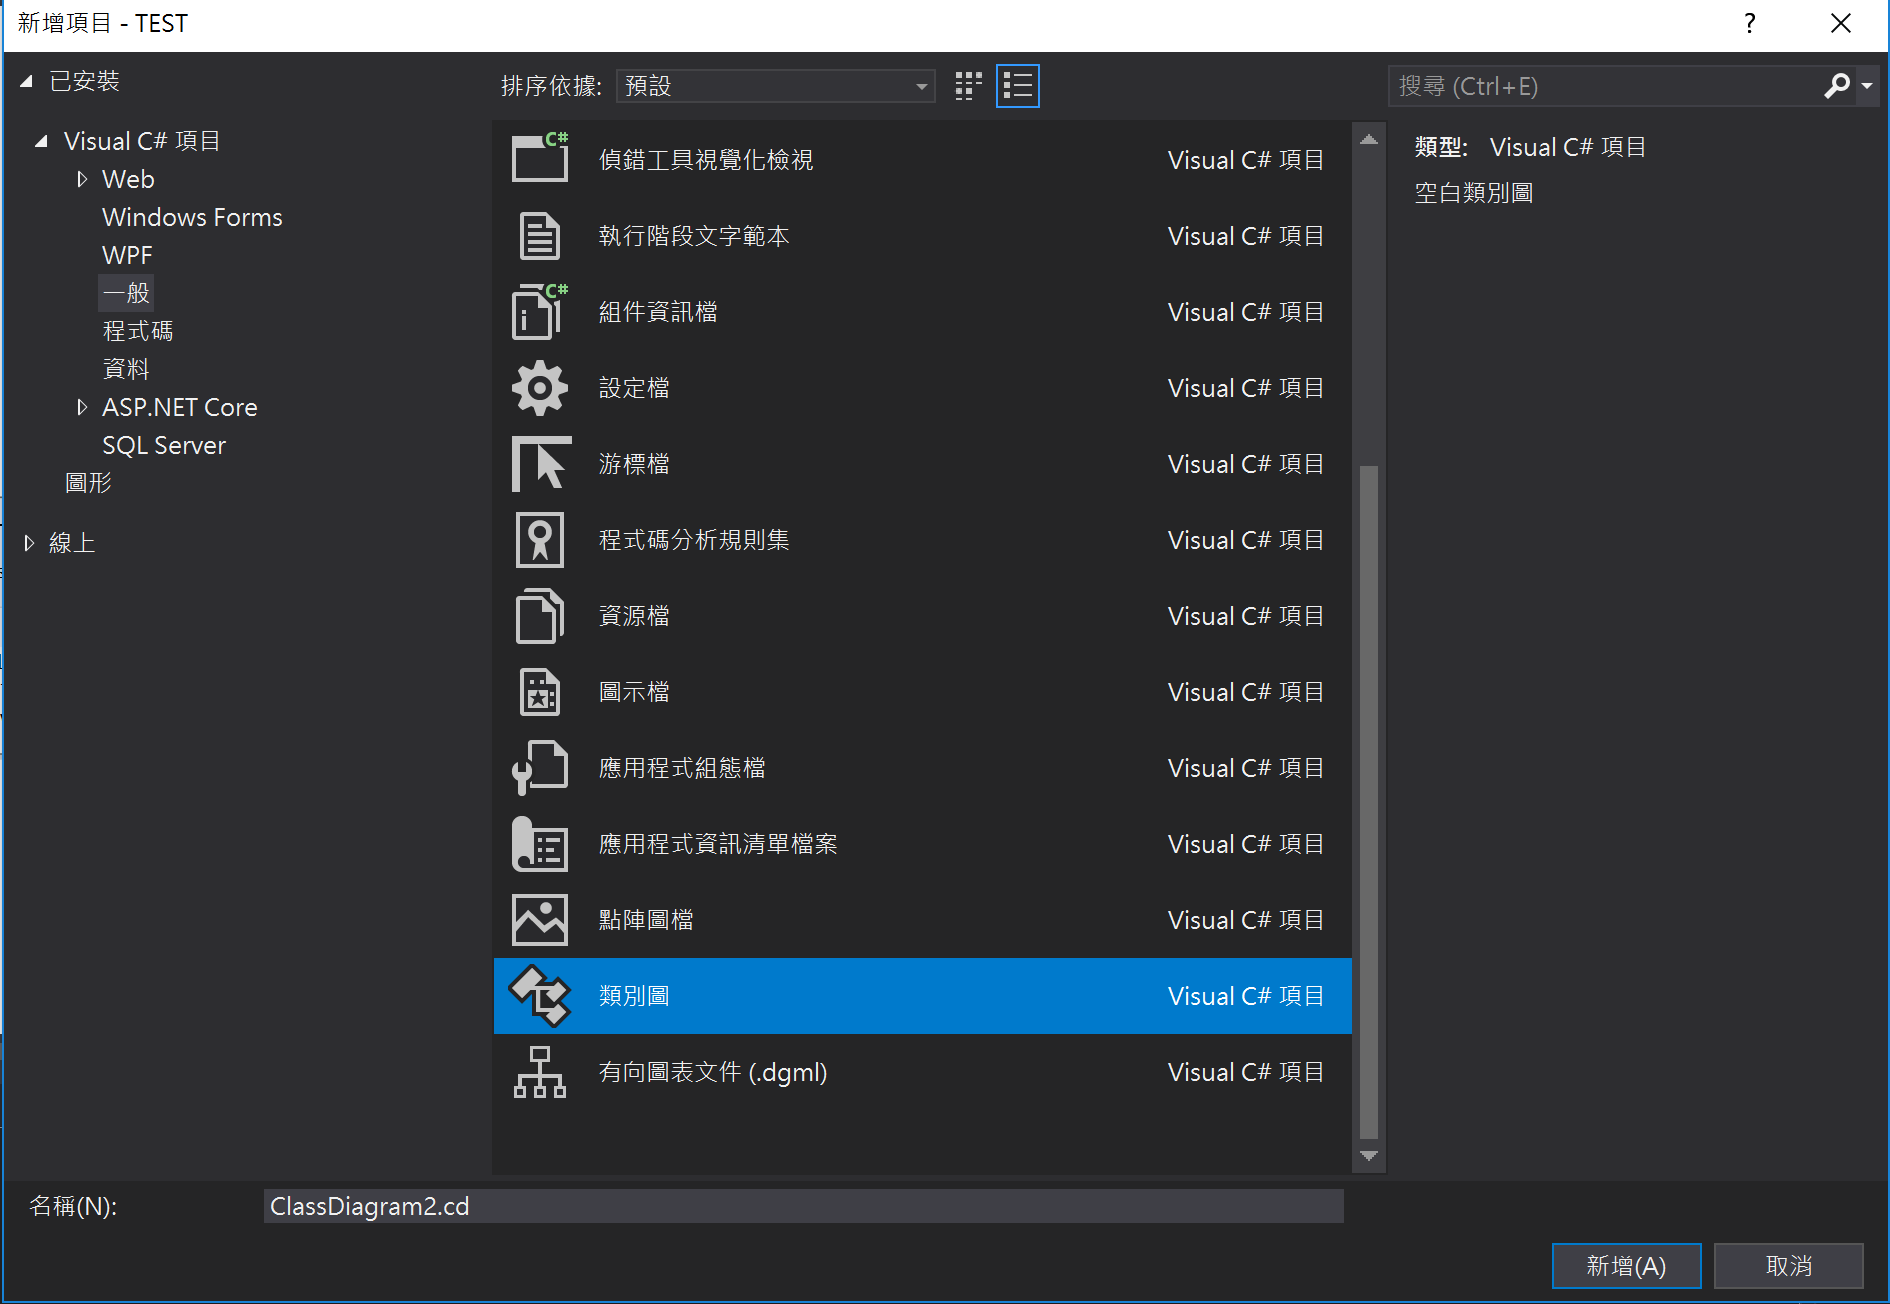
接下來回到我們的專案中,如果我們想要繪製類別圖時,可以在專案中點選右鍵->一般->類別圖

那如果我們是想要將現有的類別轉換成類別圖呢?

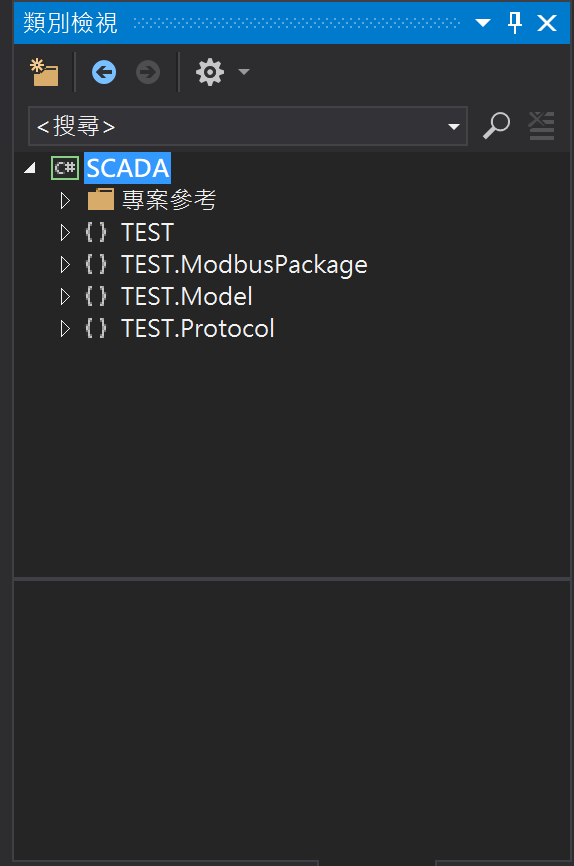
我們需要先打開「類別檢視」功能。

檢視->類別檢視

我們就可以開啟此介面。

接著在專案中,按右鍵點選 檢視->類別圖檢視

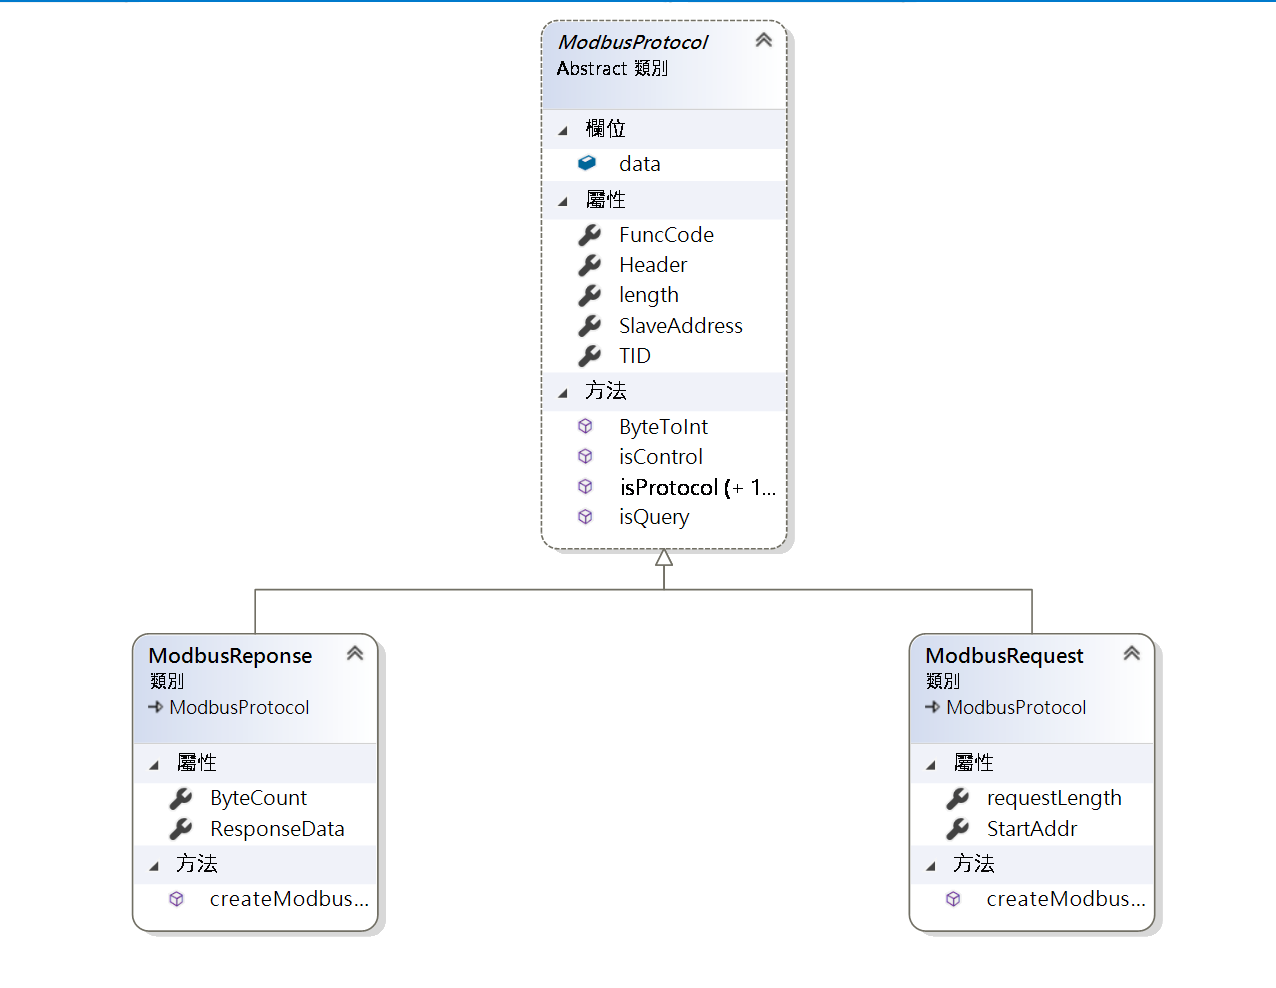
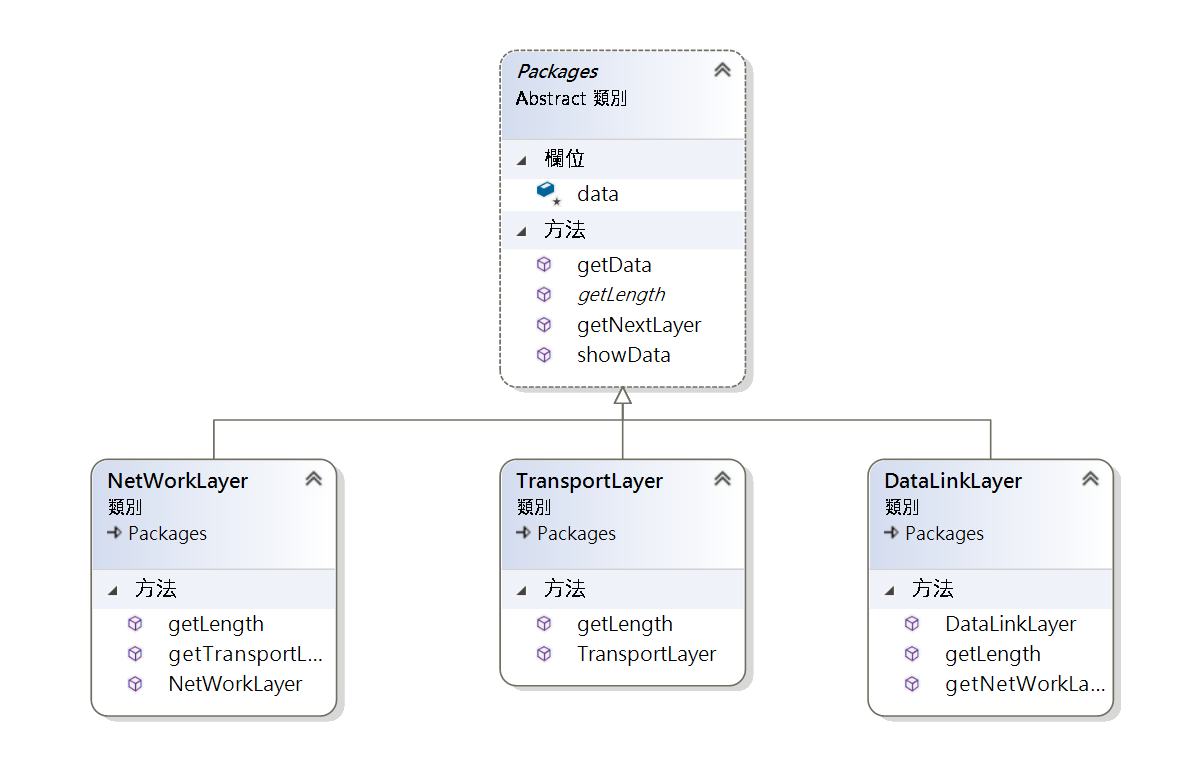
VS就會自動幫你把專案中類別之間的關係給描繪出來囉!

以下兩張圖是筆者最近在開發專案中的其中兩個 namespace

以上文章敘述如有錯誤及觀念不正確,請不吝嗇指教:)

有任何家教、案子 或技術相關問題 請都歡迎聯繫我

http://www.zhenghui.idv.tw/

ildasm.exe location (轉貼)

 It will find ildasm.exe in i.e. c:\Program Files (x86)\Microsoft SDKs\Windows\v8.0A\bin\NETFX 4.0 Tools\.


Ref:https://stackoverflow.com/questions/23006728/could-not-find-ildasm-exe-at-location-c-program-files-x86-microsoft-visual-st


2020年11月30日 星期一

使用別的namespace並且更改build order (轉貼)


Asked 
Viewed 34k times
34

I have two projects within a single solution in Visual Studio 2010. These projects are called Project1 and Project2. Within these projects, two namespaces are defined, Namespace1 and Namespace2, respectively.

Inside some code within Namespace2, I'd like to use some structs, classes, etc. which I've defined in Namespace1. Is there any way to do this?

57

Yes, add a reference to Project1 from Project2. Right-click the project, choose "Add References" then from the "Projects" tab, choose Project1.


Set Project Build Order in Visual Studio

In order to set the Build order for your Solution, right-click on the Solution in Solution Explorer and Select Project Build Order:

Your Project Dependencies should be set correctly which is used to determine the Build order by Visual Studio.

The image below shows the Project references added in the Business layer to determine that the DTO and Persistence Projects should be built first before the Business layer Project.

The Project Build order will make sure the required dlls are available for the Api to compile correctly.

2020年11月26日 星期四

XElement用法(轉貼)

 參:https://docs.microsoft.com/zh-tw/dotnet/api/system.xml.linq.xcontainer.add?view=net-5.0

範例

下列範例會建立兩個 XML 樹狀結構,然後使用這個方法,將查詢的結果加入其中一個。

C#
XElement srcTree = new XElement("Root",  
    new XElement("Element1", 1),  
    new XElement("Element2", 2),  
    new XElement("Element3", 3),  
    new XElement("Element4", 4),  
    new XElement("Element5", 5)  
);  
XElement xmlTree = new XElement("Root",  
    new XElement("NewElement", "Content")  
);  
xmlTree.Add(  
    from el in srcTree.Elements()  
    where (int)el >= 3  
    select el  
);  
Console.WriteLine(xmlTree);  

這個範例會產生下列輸出:

XML
<Root>  
  <NewElement>Content</NewElement>  
  <Element3>3</Element3>  
  <Element4>4</Element4>  
  <Element5>5</Element5>  
</Root>  

2020年11月25日 星期三

Control item in this.Controls.OfType<..>() 可能不會列出所有加到Controls的item

如下code:

 foreach (Control item in this.Controls.OfType<CheckBox>())

    {
        this.Controls.Remove(item); 
    }
會有一些成員不會刪除,我這台電腦發生的是,3, 7...不會刪除。
解法是,直接把要刪掉的成員放進去Remove:
foreach(var item in cbox)
            {
                this.Controls.Remove(item);
            }

Iterating through all nodes in XML file (轉貼)


Asked 
Viewed 167k times
36

I want to iterate through all nodes in an XML file and print their names. What is the best way to do this? I am using .NET 2.0.

38

I think the fastest and simplest way would be to use an XmlReader, this will not require any recursion and minimal memory foot print.

Here is a simple example, for compactness I just used a simple string of course you can use a stream from a file etc.

  string xml = @"
    <parent>
      <child>
        <nested />
      </child>
      <child>
        <other>
        </other>
      </child>
    </parent>
    ";

  XmlReader rdr = XmlReader.Create(new System.IO.StringReader(xml));
  while (rdr.Read())
  {
    if (rdr.NodeType == XmlNodeType.Element)
    {
      Console.WriteLine(rdr.LocalName);
    }
  }

The result of the above will be

parent
child
nested
child
other

A list of all the elements in the XML document.